
Cricut Design Space
Cricut Design Space Upload Guide
Everything that happens between downloading an SVG and pressing Make It — on desktop and on the phone app — plus the handful of errors that stop most first uploads.
Design Space accepts SVG uploads on every Cricut account, free, with no subscription. The whole process takes under two minutes once you know where the buttons live. Grab any file from the Cricut cut file library and follow along.
Upload an SVG, step by step
- 01Download and unzip the SVG. Save the .svg to your device. If it arrives as a .zip, extract it first — Design Space cannot read an archive.
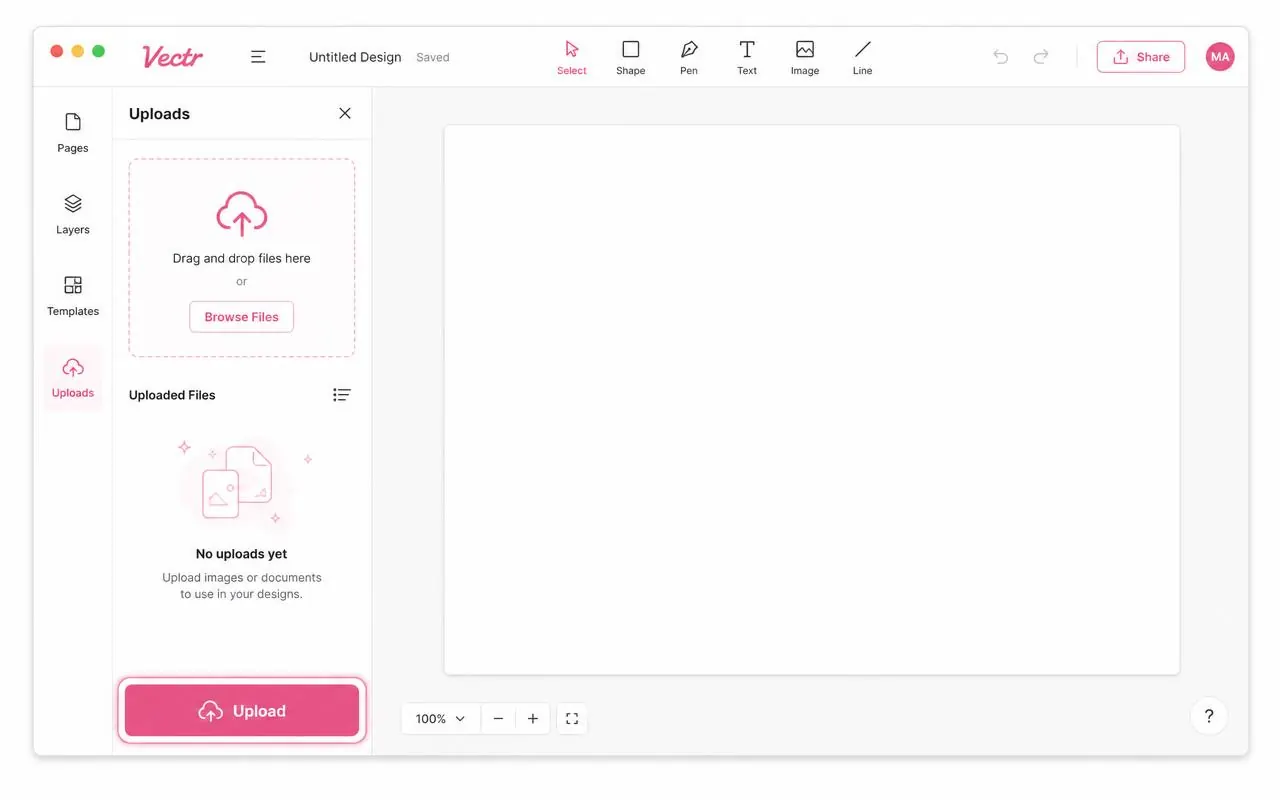
- 02Open Upload in Design Space. Start a new project and click Upload at the bottom of the left-hand panel (the Upload icon in the bottom toolbar on mobile).
- 03Browse to the .svg file. Choose Upload Image, then Browse, and select the .svg itself — not the folder it came in.
- 04Confirm the vector upload. Design Space recognizes a vector automatically, so no Simple/Moderate/Complex screen appears. Click Upload.
- 05Add the design to the canvas. Select it in Recent Uploads and click Add to Canvas. Do not click Flatten — that merges the cut layers into one shape.
- 06Size, mirror and cut. Resize from a corner handle so proportions hold, turn Mirror on for any mat carrying HTV, then press Make It.
On iPhone, iPad and Android
The mobile app follows the same route with different furniture. Save the SVG into Files on iOS or Downloads on Android, unzip it there if needed, then open a new project, tap the Upload icon in the bottom toolbar, tap Browse Files and pick the .svg. Tap the design, then Insert. Anything uploaded on a phone syncs to your account, so it is waiting on the laptop next time you open the project.
Keeping the layers intact
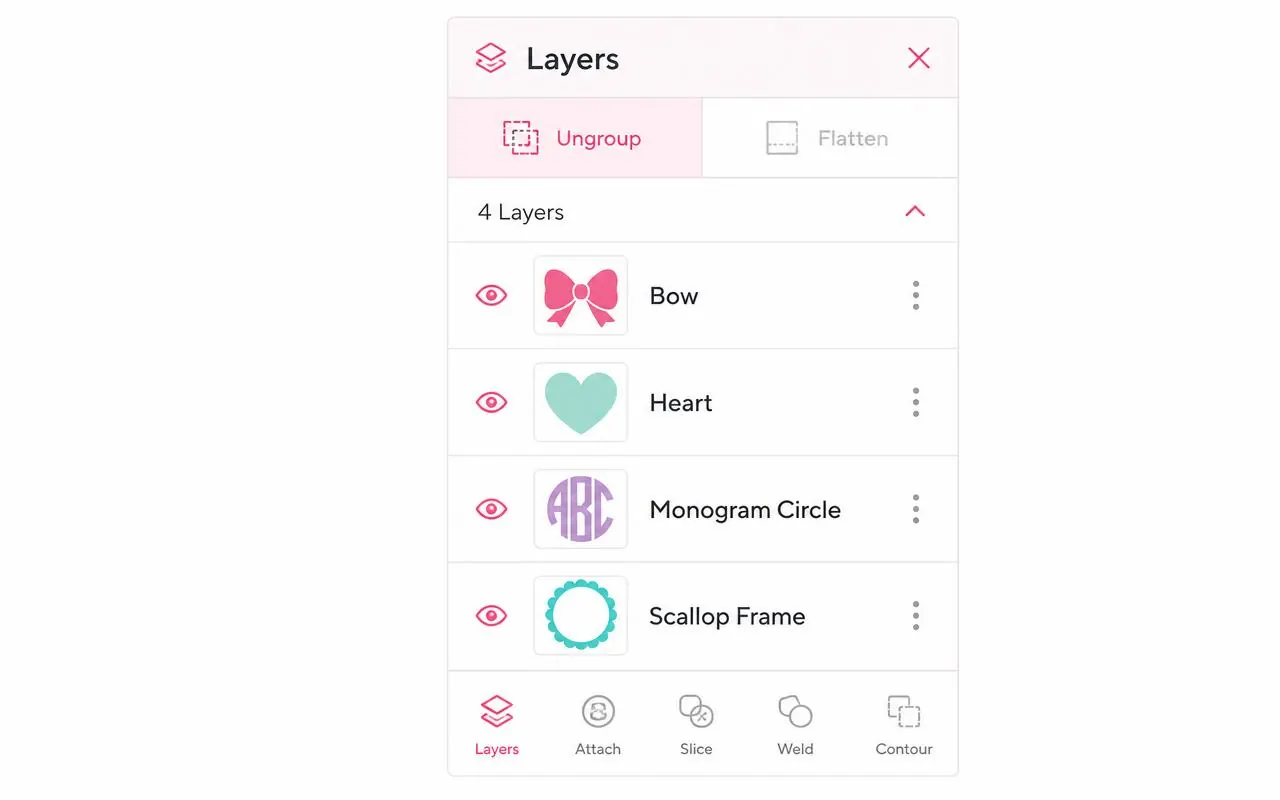
Flatten is the single most common way a good file goes wrong. It is meant for print-then-cut and it welds every color into one printable shape, which is why a three-color design suddenly cuts as one silhouette. If layers arrive grouped, select the design and choose Ungroup instead — the Layers panel should then show one line per color, each of which you can hide, recolor or move to its own mat.
- Ungroup separates layers; Flatten destroys them. Use Ungroup.
- Attach holds two layers in position on the same mat — use it for a decal and its offset.
- Weld is permanent: it fuses overlapping shapes into one cut path, so weld last.
- Slice only works on two layers at a time and leaves spare pieces behind to delete.
Errors that stop a first upload
“File type not supported”
The file is still inside a zip archive, or you selected the folder rather than the .svg inside it. Extract, then upload the file itself.
The design lands as one flat shape
A PNG was uploaded instead of the SVG. Check the extension on the file you picked — the PNG in a download bundle is there for sublimation and print-then-cut, not for cutting layers.
An extra box cuts around everything
That is an artboard or background rectangle. Ungroup, select it in the Layers panel, delete it, then press Make It.
Where to go next
Once the upload works, the rest is materials and settings. The vinyl cutting guide covers blade, mat and pressure for adhesive vinyl and HTV; layered SVG files explained covers stacking and alignment; and SVG vs PNG vs DXF explains which file in the download you actually want. For a screenshot walkthrough of the upload screen itself, read how to upload SVG files to Cricut Design Space.
Design Space upload questions
- How do I upload an SVG file to Cricut Design Space?
- Download the .svg, open Design Space, click Upload in the left panel, choose Browse, select the file and click Add to Canvas. Design Space keeps the layers and cut lines exactly as drawn — nothing needs converting first.
- Do I need Cricut Access to upload my own SVG files?
- No. Uploading your own designs is free on every Cricut account. Cricut Access is a paid subscription to Cricut's own image and font library and is not required for any file downloaded here.
- Why does Design Space say my file type is not supported?
- The file is almost always still zipped. Extract the archive and upload the .svg from inside the folder. If the extension is .png or .jpg you downloaded the preview image rather than the cut file.
- Why did my design upload as one solid shape?
- Either a PNG was uploaded instead of the SVG, or the design was flattened. Undo the flatten, select the design and choose Ungroup — each color should then sit on its own line in the Layers panel.
- Can I upload SVG files on an iPhone, iPad or Android phone?
- Yes. Save the file to Files on iOS or Downloads on Android, open the Design Space app, tap Upload, then Browse Files and pick the .svg. Mobile uploads sync to your account and appear on desktop.
- How do I stop an extra rectangle cutting around my design?
- That rectangle is an artboard or background layer. Ungroup the design, click the rectangle in the Layers panel and delete it before pressing Make It.
- Does uploading work the same on Cricut Joy, Explore and Maker?
- Yes — the upload flow is identical because the SVG is machine-agnostic. The only difference is cutting width: Joy tops out at 4.5 inches, so scale bigger designs down before you cut.
Did your SVG upload to Design Space?